Build your own Website on WordPress Tutorial 2021. This guide covers the steps required to build your own website. Making your own website is very easy. First, we will discuss the benefits of making your own website
Benefits of building your own website
You can earn money from your website by writing blog posts
There are many ways of earning money from your website by displaying ads on your website, taking part in affiliate programs, writing sponsored blog posts, selling ebooks, Offering online services, Freelancing, earn by writing reviews and a lot of ways you can choose that is suitable and easy for you
Keep one thing in mind you won’t get rich in one day. You have to work hard for that. But first focus on creating good content that interests your audience then you will be able to make good money. You can then earn a good amount of money.
Steps to build your own website
By simply following the steps mentioned below you can get your own website on the Internet.
To make your own website you need two things
i. WordPress Hosting
Hosting is the place where your website files are stored
ii. Domain name
The domain name is the address of your website e.g google.com or facebook.com. You can make your own depending on the availability.
Why should you choose WordPress to build your own website
WordPress is the best platform for making your own website. The reason is that you could easily make the website even if you don’t know the ABC of coding. Even I build my website without writing even a single line of code. WordPress has plugins and themes which make your work easy. But if you have some knowledge of coding that would be an added advantage.
Now that you have some idea about building a website. We now move to the hosting provider which you should choose. I am using Bluehost hosting provider for hosting my website. They are the recommended host provider by WordPress itself.
The reason for choosing Bluehost as Hosting provider to Build your own Website
i. They offer a free domain with hosting which means you don’t have to pay extra bucks for domain registration
ii. They are one of the best hosting providers when it comes to uptime which means your website will rarely face any server issues
iii. They offer 30 days money-back guarantee. If you are not satisfied with their hosting you can get your money back within 30 days
iv. Their 24×7 support. If you have any problem related to your website just open chat and they will help you. One thing I like about them is that they can optimize your website (database optimization) if you ask them. So, you don’t have to worry about that. If you are a beginner they will guide if you ask them about different functions available in the WordPress dashboard.
v.They offer a free SSL certificate. SSL certificate is preferred by Google. The website has an SSL certificate protects information and the websites possessing SSL certificate rank higher on google
vi. They offer 1 click easy WordPress installation which means as you purchase their hosting WordPress will be installed easily without going and manually downloading it

To get started just click the banner below which will take you directly to hosting registration panel
OR
Try Domain Name Checker given below
Currently, they offer three hosting plans. For beginners, the Basic plan will work. I am also using this plan for my own website. So that will do.

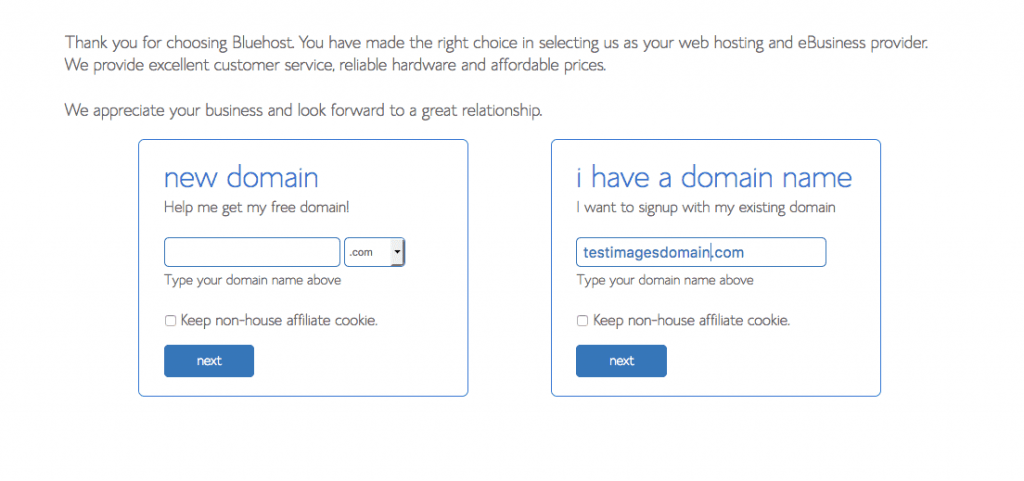
Then you have to choose a domain name. Choose a unique domain name that describes the niche you will work on. You can choose any depending on the availability. There are also options of .com or .us etc. If you need a country-specific domain like if you need it for Pakistan you can choose .pk for the US and UK you can choose .us and .uk respectively. I recommend you choose a .com domain name which is neutral means that it is not region-specific. It will work worldwide.

After selecting that you will be taken to a window where you have to enter account information, package information and payment information. Enter your account information.

After that in package information, you will choose the duration of your hosting plan. For beginners I recommend you to choose a 1-year plan. At this time I am also using this plan. Also, there are other add-ons like Domain privacy protection, Sitelock security, Codeguard basic and Bluehost SEO Tools. They have their own price. For now, you can skip them by unchecking them. You can add them later on if needed. I have also skipped them and not using any of them right now.

After that enter your payment information which includes your credit card details. Then click on Bluehost terms of service and Submit.

After that, you will be taken to the Bluehost Dashboard where you will install WordPress. Go to Marketplace in featured products click one-click install.

From there choose WordPress to enter your site name and site tagline. Then select your domain name. After that choose the admin name and password. You can change that later on. Click install to install WordPress for your site. After that, you will have to log in to your website.
Congratulations you have successfully created your own Website.
Follow us on Facebook, Twitter, Instagram, Pinterest, and Tumblr.


